
I have had a very busy and distracting 3 weeks or so....my main computer broke about 3 weeks ago. Luckily, the data was saved, but all of my contact information and recent photos are on still unavailable until I get the new computer organised; it still hasn't been delivered!
Also luckily, I have access to a laptop which I am working here, now, and I was able to cobble most of my life together with it. No addresses, no pictures, no regular graphics programmes; its been tedious to cope.
Interestingly, the operating system doesn't support my beloved camera! ARGH. I had to get a usb camera card reader just to down load the pictures you see here now into the laptop. The sense of trauma and anxiety have passed somewhat, but I still have trouble locating where the pictures GO when I download them, and the filing system is just DIFFERENT. I don't like DIFFERENT on my computer, I want it just the way I had it, which was easy and quick. Oh well..... sigh.
Also this week, and just to add to the hilarity and chaos, my car broke, definitively. Not worth fixing. So all week I had to look for a suitable car replacement. Ugh. Really hard work. In the end it worked out OK, and I got a decent car...but what another big waste of valuable creative time, and it's all made my head throb.
Phew.
.......................................................
In the meantime, one's work MUST continue....!
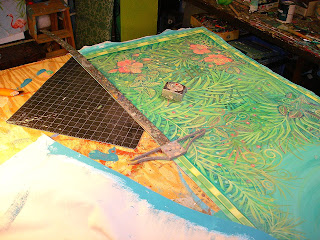
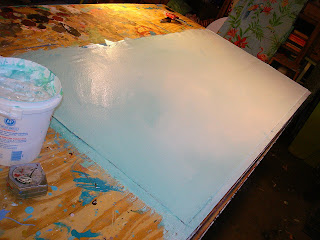
Here are some pictures showing the painting and sealing of the edges of the floorcloth I was working on at the time, it seems about 100 years ago:

 Here are the two floorcloths rolled up and ready for delivery, along with some of the fabric samples I used for this and the tiles project.
 .....................................................................................
 Here it is finished. I hope to have a picture of it installed to add to this post someday!
 .............................................................................................

Also luckily, I have access to a laptop which I am working here, now, and I was able to cobble most of my life together with it. No addresses, no pictures, no regular graphics programmes; its been tedious to cope.
Interestingly, the operating system doesn't support my beloved camera! ARGH. I had to get a usb camera card reader just to down load the pictures you see here now into the laptop. The sense of trauma and anxiety have passed somewhat, but I still have trouble locating where the pictures GO when I download them, and the filing system is just DIFFERENT. I don't like DIFFERENT on my computer, I want it just the way I had it, which was easy and quick. Oh well..... sigh.
Also this week, and just to add to the hilarity and chaos, my car broke, definitively. Not worth fixing. So all week I had to look for a suitable car replacement. Ugh. Really hard work. In the end it worked out OK, and I got a decent car...but what another big waste of valuable creative time, and it's all made my head throb.
Phew.
.......................................................
In the meantime, one's work MUST continue....!
Here are some pictures showing the painting and sealing of the edges of the floorcloth I was working on at the time, it seems about 100 years ago:
Here are the two floorcloths rolled up and ready for delivery, along with some of the fabric samples I used for this and the tiles project......................................................................................Also at this time I completed a project I began with two fabric window coverings Fabric For Window Treatment ...this is a piece of wood that will embellish the area above the shower door in one of the bathrooms.
Here you see the beginning of the layout, in chalk. Chalk is great for making lots of quick changes. After I establish the design in chalk (easy to correct over and over), I block it in with paint right away, and begin the process of finessing it into something finished.
Here it is finished. I hope to have a picture of it installed to add to this post someday!.............................................................................................The next projects are about fabric. I have several fabric pillows to paint for a variety of clients. Here I am putting down the base colour to stretch the fabric for a series of bird pillows. And here I am blocking out the area for each pillow square. About 22" square each. Some of these will be backs and some will be fronts..
And here I am blocking out the area for each pillow square. About 22" square each. Some of these will be backs and some will be fronts.. ...................................................................
And finally, the delivery of the floorcloths. You can see the tile back splash in some of these pictures. Also see : Tile Installation Day!  They look great!

The weather was rather chilly for here, that week, (maybe about 58 F) and the floorcloths were stiff from the cold as I laid them out. They will flatten up over the course of the day. On a hot day they are soft and would just flatten out immediately. On a REALLY cold day, a hairdryer can soften a floorcloth perfectly, and allow it to lie flat right away. These floorcloths actually heated up quite well in the car driving to the destination in the sun. They were floppy when I took them out of the car. By the time i was in the house they had stiffened up a lot! Interesting material, isn't it?


 .......................................................
 This platter will go in the same kitchen as the floorcloths and the tile back splash shown above.


 They look great!
The weather was rather chilly for here, that week, (maybe about 58 F) and the floorcloths were stiff from the cold as I laid them out. They will flatten up over the course of the day. On a hot day they are soft and would just flatten out immediately. On a REALLY cold day, a hairdryer can soften a floorcloth perfectly, and allow it to lie flat right away. These floorcloths actually heated up quite well in the car driving to the destination in the sun. They were floppy when I took them out of the car. By the time i was in the house they had stiffened up a lot! Interesting material, isn't it?


 .......................................................
This is the platter shown un fired in an earlier post:
It didn't fit in my kiln, so I had to bring it to a commercial firing place and they fired it beautifully.
This platter will go in the same kitchen as the floorcloths and the tile back splash shown above.As you might be able to see, its been hectic!...not only did my computer break, and then my car broke, I had a variety of disparate projects to start and finish the whole time. Maybe that's easier than a big long one. I don't know! But in the end all the work turned out great, and all that other stuff is OK, with setting up the new computer still looming as soon as IT arrives...
I will make a separate post for another event I participated in earlier this week. Stay tuned!!!


 I use the trim and seal method of finishing the edges. Traditionally, the edges of

 Here is the the start of the companion
  The art work part is done, now I will protect it with 3-4 coats of satin (in this case) acrylic urethane. Then I will pull the staples and trim and seal the edges.


 But here you can see the fish looking like they are pretty happy swimming around....
 The canvas is primed, on both sides....And the work begins.....


 Click on the pictures to see them larger.


 After....
 Before firing.....

